Choose the inspection camera around the access point first

Product use sequence

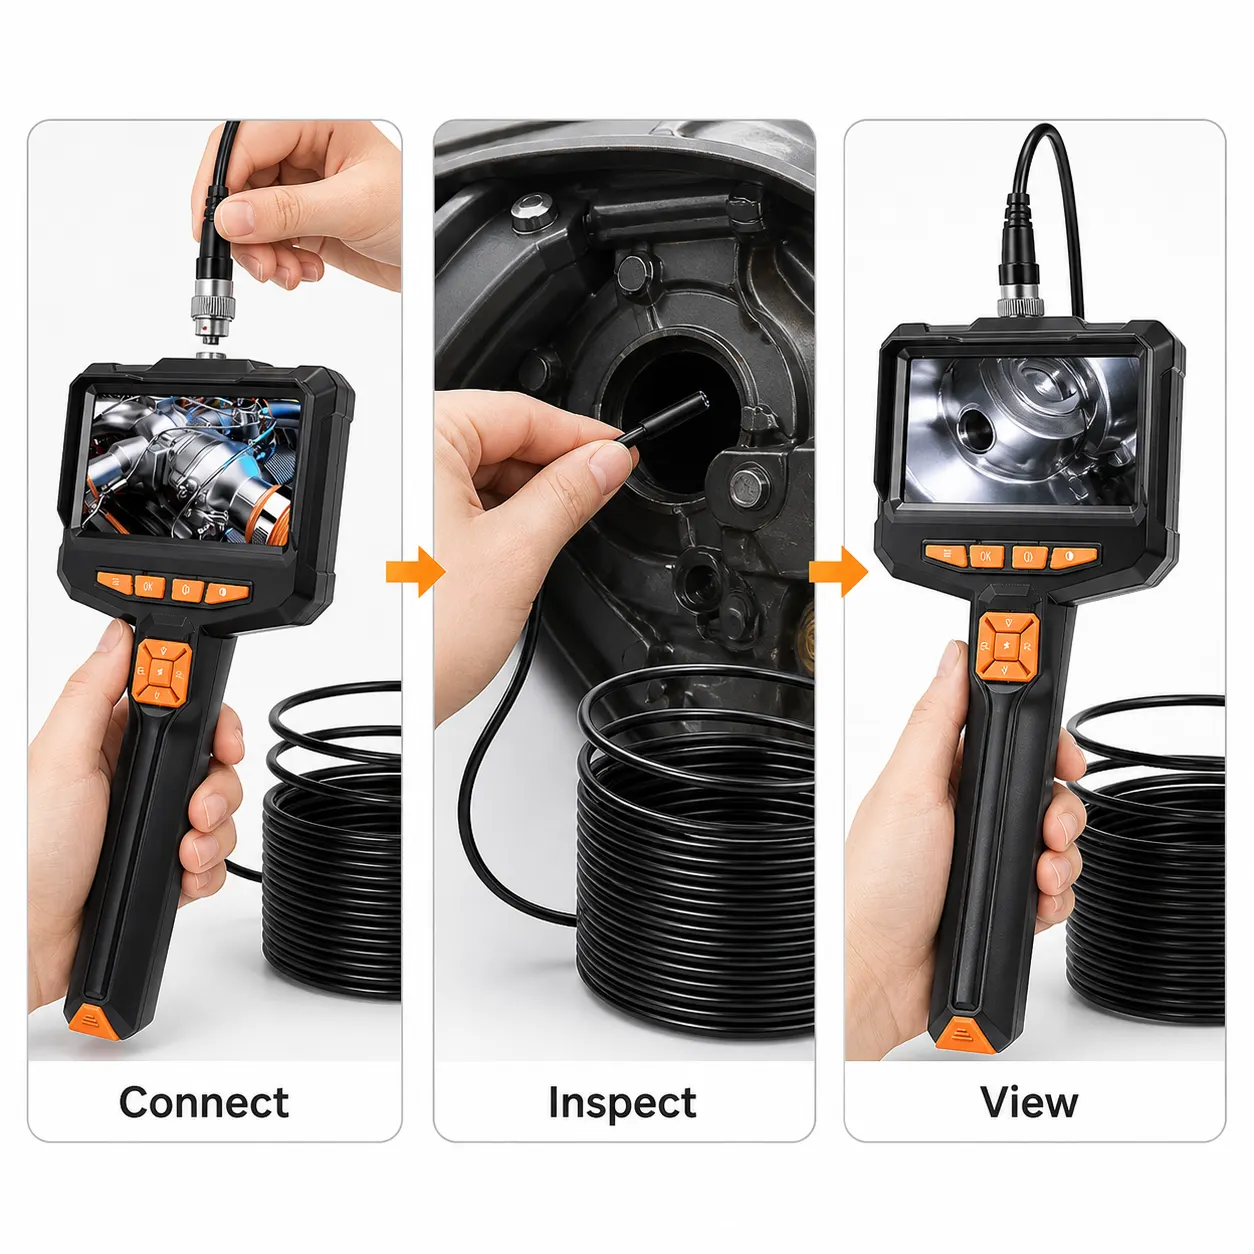
The best way to decide how to choose inspection camera is to start with the smallest opening and the furthest point you need to reach. Check the camera diameter, cable length, cable behaviour, lighting and screen before you worry about extras. For the listed model, that means comparing a 7.9mm lens, a 5-metre semi-rigid cable, eight adjustable LEDs and a built-in 4.3-inch IPS colour screen with the actual space in your vehicle, pipework, machinery or workshop fixture. If those basic dimensions do not suit the job, a sharper screen or extra accessory will not solve the mismatch.

The buyer is usually trying to make a recurring inspection less disruptive: looking behind a panel, checking a car component, following a pipe route or seeing into a tight part of a machine. Decide whether you need a self-contained viewer or a camera that works through a phone. This product is designed to work without Wi-Fi, an app or a smartphone, so it suits someone who wants to switch on a handheld unit and view the feed directly. The decision is therefore about access and working method, not simply choosing the camera with the longest feature list.

Match the camera to a UK garage, workshop or packing bench

In a garage or maintenance workshop, the useful question is not whether an inspection camera sounds industrial; it is whether its physical setup matches the object being checked. A five-metre semi-rigid cable can be bent and guided into position, while the 7.9mm lens is the part that must pass through the access point. Measure the hole, gap or opening rather than estimating from memory. Also consider where you will hold the screen: a built-in 4.3-inch display keeps the viewing device with the camera, which may be more straightforward when both hands are occupied with positioning the cable.

The same checks apply at a packing bench or fabrication workspace, although the surroundings may be less wet and less enclosed. A handheld design and USB charging could suit a user who moves between inspection points rather than leaving a camera permanently installed. The listing states up to four hours of use from a quick USB charge, but the real requirement depends on how long your inspection sessions last and whether the unit is charged between jobs. Treat that figure as a documented operating claim to compare against your routine, not as a reason to skip planning for charging.

Check reach, flexibility and the opening before buying

Reach is a combination of cable length and cable control. The listed 5-metre cable gives you a stated maximum length to compare with the route you need to inspect, but length alone does not tell you whether the cable will hold the direction you want. It is described as semi-rigid, meaning the product information presents it as both bendable and able to retain useful form. Before choosing it, think about bends, obstructions and the distance between your working position and the inspection point. A long cable is not automatically better if the task needs a shorter, more precise probe.

The lens diameter is an especially important check for narrow access. At 7.9mm, it may be suitable for openings that can accept that size, but you must compare it with the actual entry point and allow for the surrounding shape of the fitting or hole. Do not assume that a camera will pass through a space merely because the target is visible on a diagram. Note the opening, the route and the depth in your own workplace. If you cannot measure the access point safely or accurately, pause the purchase until you have that measurement.

Check the screen, viewing angle and built-in light

The viewing setup matters when you are working beside a vehicle, under a bench or at a workshop fixture where a phone may be inconvenient. This model has a 4.3-inch IPS colour screen and a stated 1080x1920 HD resolution. Those are useful documented checks, but they should be read alongside the size of the detail you need to identify. A screen can show the camera view without telling you whether a particular defect will be clear enough for your purpose, so consider whether you need to distinguish a broad obstruction, a surface condition or a very small mark.

Dark spaces create a second practical test. The camera has eight adjustable LEDs, with brightness changed using a button, and a 178-degree wide-angle lens according to the listing. That combination may help you frame what is around the lens, but it does not remove the need to position the probe carefully. Reflective, cramped or uneven surfaces can still make a view difficult to interpret. If your task depends on a precise angle, check whether the supplied side-view mirror could help, while remembering that the product information does not state how every accessory will perform in your particular space.

Use the wet-work claim carefully in plumbing and maintenance areas

The product is listed with an IP67 waterproof rating and described for wet and rough conditions, including plumbing, automotive, electrical and HVAC checks. That is a documented product claim to put beside the environment in your own workshop. Ask what part of the camera will encounter moisture, how long the inspection normally takes and whether the screen and controls remain in a suitable position. Do not turn the rating into a general promise that every wet job is appropriate, especially when the listing does not provide a fuller operating procedure for your exact environment.

A sensible buyer also separates seeing into a damp space from using equipment in every kind of liquid or alongside every electrical condition. The supplied information does not provide a safety method for live electrical work, chemical exposure, high-temperature areas or pressurised systems. If your inspection involves any of those conditions, the camera should not be selected on the waterproof claim alone. Match the documented rating to the job, follow the relevant workplace procedure and rule out the purchase when the environment demands specifications that are not provided.

Spot the mismatches before choosing an inspection camera

This model may be a poor fit if you need phone-based sharing, Wi-Fi control, an app workflow or a smartphone screen. Its stated advantage is the opposite: it works without Wi-Fi, apps or a smartphone and includes its own display. That makes the buying decision clearer for a user who wants an independent handheld tool, but less suitable for a team whose process depends on transferring images through a mobile device. The available product facts also do not confirm recording, image export or other documentation functions, so do not buy it expecting those capabilities.

There are other boundaries worth writing down before checkout. The listing gives a cable length, lens diameter, screen details, light count and battery-use claim, but it does not provide a full dimensional drawing, temperature range, image-storage specification or detailed control of the probe tip. It also does not establish that the camera is suitable for every vehicle, pipe, electrical installation or HVAC system. If your job requires a specific temperature tolerance, a particular bend radius, recorded reports or a smaller probe, treat the missing fact as a question to resolve rather than filling the gap with an assumption.

Run this inspection camera comparison at your workbench

A useful comparison can be done on paper before you choose. Write down the smallest opening, the distance from your standing position to the inspection point, and whether the route includes bends. Against those measurements, check the 7.9mm lens and 5-metre semi-rigid cable. Then record whether you need a built-in screen or a phone connection; the documented setup here is a 4.3-inch IPS colour screen with no Wi-Fi, app or smartphone requirement. This prevents an appealing specification from distracting you from the physical constraints of the task.

Next, compare the working conditions and the session length. Mark whether the space is dark, whether adjustable illumination matters, and whether moisture is present. The listed checks are eight adjustable LEDs, a 178-degree wide-angle lens and an IP67 waterproof rating. Finally, compare the expected inspection period with the stated up-to-four-hour use from a USB charge. Keep the supplied accessories in view too: hook, magnet, side-view mirror, Type-C cable and manual. Choose only when the concrete checks align, rather than because the kit appears generous.

Check the supplied accessories against the actual task

The accessory set can affect how practical an inspection feels, but each item should have a defined job in your workspace. The hook and magnet may be relevant when you need to position or retrieve something within the view, while the side-view mirror may change the direction from which you see a surface. The product information confirms that these items are included, along with a Type-C cable and manual. It does not describe the dimensions, reach or performance of each accessory in detail, so compare them with the object and access route rather than assuming they cover every situation.

This is particularly important in a garage or workshop where a camera may be used around different components. An accessory cannot compensate for a lens that will not enter the opening, a cable that cannot be guided around the obstruction or an environment outside the documented information. Use the included manual as part of the setup check, and identify how the camera, cable, screen and light controls will be handled before starting work. If the task needs a specialised attachment that is not listed, record that gap and seek confirmation before relying on this configuration.

Take a measured next step from the workshop job sheet

Before choosing, make a short job note with six lines: access opening, inspection depth, route shape, lighting, moisture and viewing method. Fill in the first three with measurements from the car, pipe, machine or bench fixture. For lighting, decide whether the eight adjustable LEDs and brightness button address the dark area you need to see. For moisture, compare the environment with the stated IP67 rating without extending that claim to conditions not documented. For viewing, decide whether a self-contained 4.3-inch screen is preferable to a phone-based arrangement.

If the note matches the 7.9mm lens, 5-metre semi-rigid cable, built-in screen, adjustable LEDs and stated up-to-four-hour USB-charged use, this configuration is worth considering for the defined inspection job. If one essential check fails, stop and look for a different setup rather than hoping the mismatch will be manageable. Keep the product facts and your measurements together so another person at the UK garage or workshop can understand why the camera was selected. That simple record turns how to choose inspection camera from general browsing into a practical, defensible decision.